Showing posts with label Teacher Tips. Show all posts

10 Sensory Room Must Haves


Are you looking to create a sensory space or add to your sensory area/room for your students who are dealing with sensory processing disorder? Don't worry if you only have a small space, or you are just getting started, you can make a great space to meet the needs of your students! It took me 9 years to complete our space and I am constantly adding to it. My room started as a swing and a trampoline and has grown from there. In this post, I list my top 10 sensory must haves. I am compiling this list based on my student's combined preferences over the past 9 years! But before I dive in, a quick sensory room picture tour is in order:


As I stated above, my "room" started as a corner in my classroom. I started with a swing and a trampoline. I added over the past 9 years, and I am constantly looking to add more to it. A lot of the items in this room were gained through local grants and a lot of the items in this room were purchased with PTO money (our PTO gives us an allowance per year, I typically save mine to buy items for the room). As with most teachers, a lot of this is also my own money. So really, this room is a combination of efforts, and has taken quite a while to create. If you plan on spending your own money to create your space, I have a few suggestions on how you can save! You can find the "Ultimate Sensory Strategy Guide" in my TPT Store Linked Here: The Ultimate Sensory Strategy Guide

However, on with the list! The following are the top ten most frequently used items in our sensory area! (Please note this post contains affiliate links in order to make it easier to find items related to the post).

10. Ball Pit/Tunnel 

I don't have a live action picture of this in use, because it's put away at the moment (due to summer cleaning). We have a Ball Pit tunnel (similar to the item below). It is collapsible so it's easily stored when not in use. We have a tub full of balls that we keep on the top shelf. We add the balls to the tunnel and the students crawl in, creating the perfect "chill zone". We are also looking into getting a ball pit. If you're looking to save money on this, you can use an inflatable or plastic pool, and fill it with balls! I also found this collapsible pit, that is now in my amazon wish list!  

9. Trampoline 

This was one of the first items we had in our sensory room. It is a great activity for alerting-- student's who are under-responsive to stimuli. Just set the timer and let them jump! 


8. Light Table 

This was one of the items that I got with a grant. Light table's can be expensive! This one was a little over $300, BUT they don't have to be! When I wanted to create a light table for my daughter's at home, obviously without paying $300 for it, I created my own! I bought a clear storage tub, a strand of white Christmas lights and some tracing paper. I taped the tracing paper on the inside of the storage tub to create a soft appearance when I turned the Christmas lights on. It worked perfectly, and the best part? It cost me $20!

Our light table at school! 

Light Table I created at home for $20


7. Fidgets 

We have a fidget drawer in our area where the students can go and grab whatever they need at the time. Some things I have in there are: large soft pipe cleaners (found at my local craft store), scarves, ribbon dancers (for rythmic gymnastic-- huge hit!), tangles, LED light toys, slinky pop tubes, sensory balls). I am constantly adding new things to this drawer! I linked a few below!

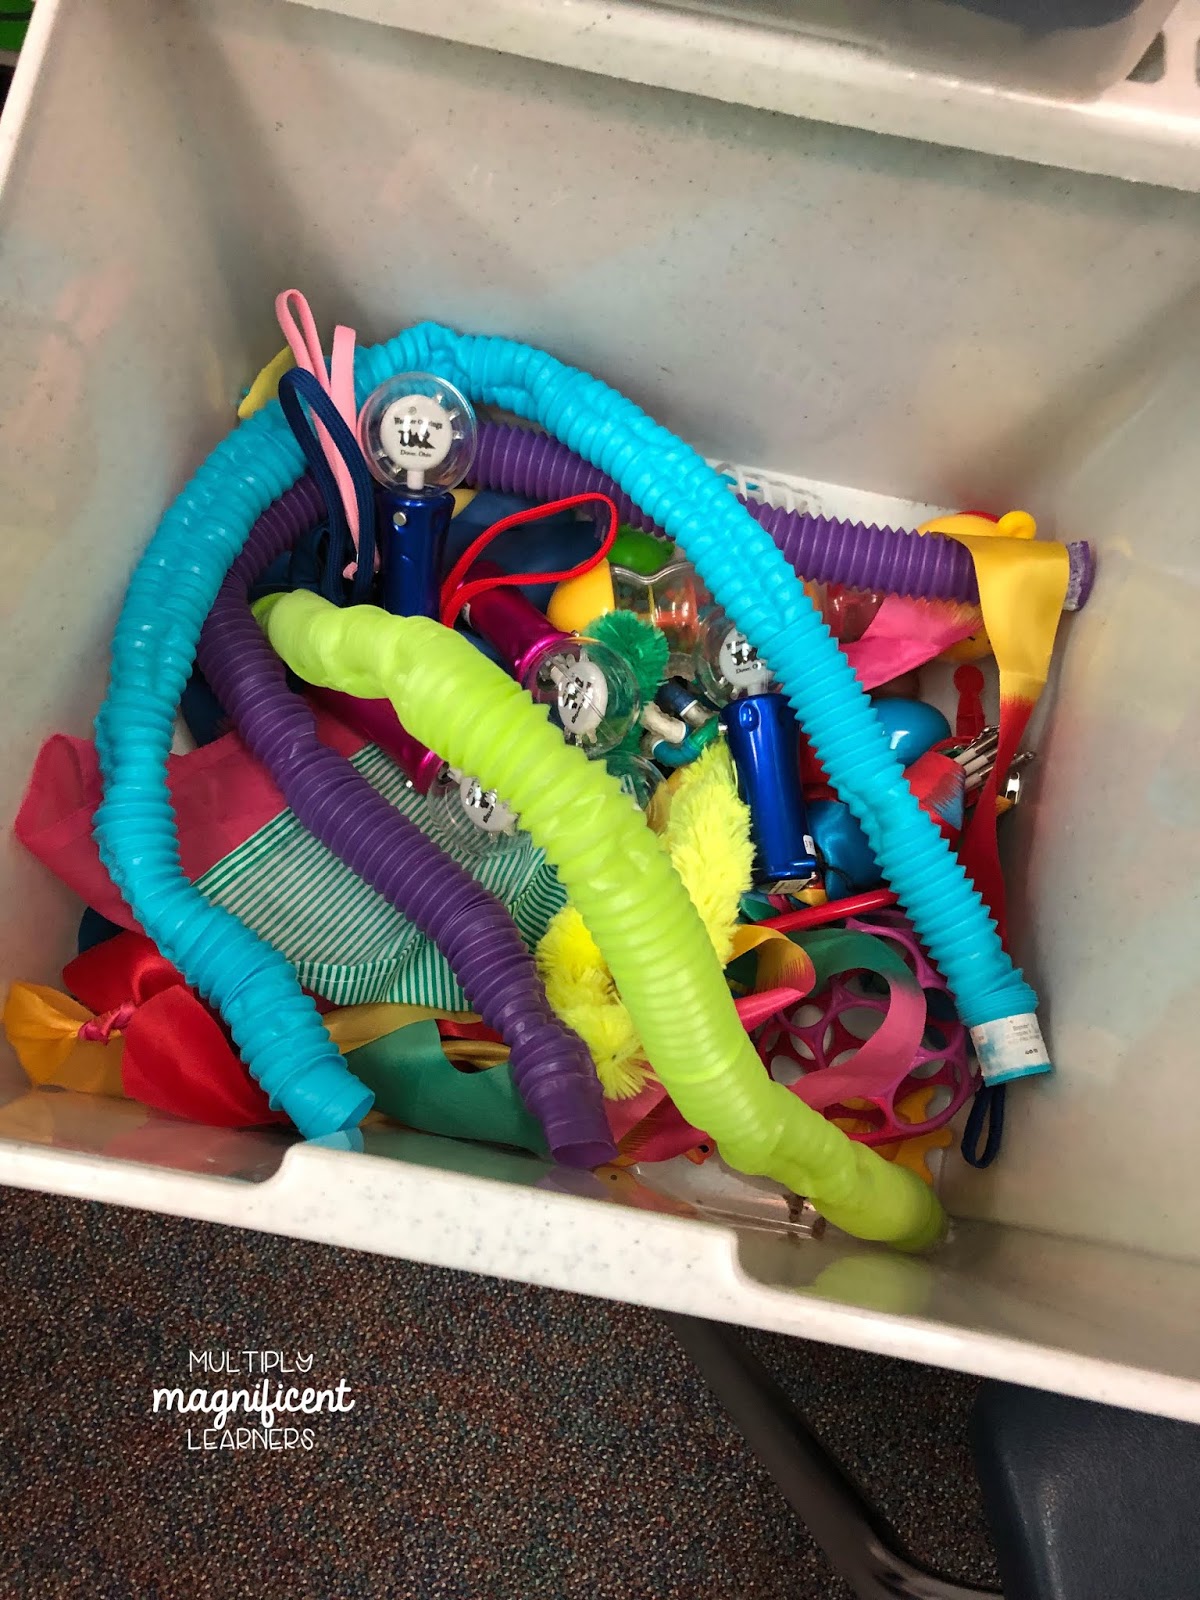
Classroom fidget drawer

6. Cozy Corner/Area

A cozy space for students to calm down or relax. Bean bags, tents, canopy's are all great ideas. For us, our cozy are is our tent. A hugely popular place to just "chill out". I have two of them, and they are pretty worn. These were found at local thrift shops for super cheap ($5). The one in the picture below was donated to our room by our SLP. It's pretty worn as you can see in the photo, but this is definitely a place my friends like to go to get a break! This tent is fold-able and is easily stored when not in use (as seen in the first few pictures above in the room tour photos!). 

This tent is currently our favorite "chill zone"

5. Weighted Blankets/Lap Pads

These items are essential for student's who are over-stimulated! Our weighted tools get used frequently, and are such an effective way of helping a student self-regulate. Our weighted blanket was ordered from a special education catalog, but you are able to find people who make weighted blankets on Etsy, or even on Amazon! Weighted blankets have been proven effective in helping relieve symptoms of stress, anxiety, sleep disorders, and ADHD. 

Our weighted blanket

Drawer with weighted lap pads, vests, vibrating weighted snake

Huggaroo Weighted Blanket for Children: Anxiety Relief, Stress Relief, Autism, Relaxation and Stress Reduction, Better Sleep, ADHD, Sensory Processing Disorder (SPD) and Insomnia (6.5 lb, 36x48 in)

4. Soft Lighting

We use blue Christmas Lights. I wasn't able to snap a picture of it because I had to replace the strand of lights, but we hang the blue lights throughout the room so that we can turn off the lights when necessary but still create a calming environment. This is a cheap, easy way to add to your sensory room/area. We also use lamps whenever possible to create a softer lighting experience for my kiddos. 

3. Light Filters 

I am 100% obsessed with the light filters in our sensory room. It creates such a calming and relaxing environment as soon as you hit the door. We bought these a few years ago, before I had a designated "sensory room" and we had them in the corner of the classroom to create that calming space and since then I have bought so many more... I can't get enough. Students who suffer from sensory processing disorder can be particularly sensitive to fluorescent lighting (which is what most schools have!) so getting light filters can be a major game changer! 

These light filters are a game changer! 

I AM GIVING AWAY A PACK OF 4 BLUE LIGHT FILTERS! IF YOU WOULD LIKE TO ENTER, FILL OUT THE GOOGLE FORM WITH YOUR EMAIL! 

2. Swing

Our swing stand is ancient and I have been asked many times where we got it from and the truth is, I have no idea. It was given to me when I started to build upon my sensory room from my district. It's very, very old, but I know that it is called a "C-Swing" stand. I have linked a few below. We have three different types of swings currently (but always looking to add more!). We have 2 different sized platform swings. One is small and round, and the other is large enough for the kids to lay down on and is rectangular. Our absolute favorite swing is the Airwalker swing which is shown in the photo below. This airwalker swing cuddles the students when they get in it, making it feel like a giant cozy hug! Another question I get is about the padding-- the padding is just regular old gym mats from the gym teacher. I just walked down and asked if he had an extra and he offered up two! I just propped them up against the wall and used heavy duty velcro to keep it to the wall. 

Airwalker Swing and C-Swing Stand 

1. Sensory Table 

Our most used, most coveted item in our sensory room is our sensory table. It is used every day, multiple times a day. The table pictured here was around $150 but if you don't have that, you can create small sensory "tubs" and use that as a sensory table! I bought tubs from the dollar store when I want to do several different sensory table activities at the same time (see picture below). I change out my sensory table monthly so that there is something new to explore in it every month! My student's absolute favorite sensory table item? Colored dry pasta. Yep, that's right, cheap, easy, colored dry pasta! They LOVE it! 


I hope you find these tips helpful! I will be making another blog post to answer all of your questions about my sensory room soon! If you have a question, drop a comment below! 

If you would like to be entered to win 4 of the blue light filters for my giveaway follow the link and enter your email! 

3

Unique Learning System Lesson Planning


One of the most frequent questions I have been asked is how I use Unique in my classroom and how I plan! I have to admit, I am an avid fan of Unique Learning System, however, I do not use ALL components of the unit. I have been using ULS for about 5 years now, enough to have figured out which pieces of the unit fit best with my students. One of the good things about Unique is that they provide you with an abundance of materials. I have not met one teacher yet that is able to use ALL of the plans from the unit (and if you are one of those teachers more power to ya!). For me, the key is to find what works best for your students!

Monthly Mapping 

The first thing I do is grab a monthly calendar and my blank planning template (I will post the link to this free resource below). I mark all the days that we will be off and out of school. Once I have those days crossed off I start my planning. I print the first page from the unit that lists all the lessons. I plan when I will give my pre-assessment and then when I want my students to have their post assessment. If you do not use the Unique GPS, I highly recommend it! You can see student weak areas, what they need to focus on and you can see their growth over the month. I love it! Next, I choose the activities that I feel best introduce the topics to my students and highlight them. After I have all the activities chosen, I add them into my calendar.

Unique GPS data 


FREE Blank Template 

Selecting the Activities

I have used Unique long enough to discover what works best for me and my students. It has changed yearly. This year, I used the following activities consistently every month: 
  • Leveled Book (Lesson 1) and corresponding activity 
  • Leveled Book Comprehension (Lesson 2) 
  • Easy Read Book (Lesson 3) and corresponding activity  
  • Easy Read Book Comprehension (Lesson 4) 
  • Vocabulary (Lesson 12) 
  • Literary Experience (Lessons 15 and 16) 
  • Vocabulary Sort (Lesson 18) 
  • Science Experiment (Lesson 28)
  • History Timeline (Lesson 29)  
Supplemental Activities I use:


  • Adapted Book Packs (samples of the packs in the picks below!) I created these book packs to help me supplement the curriculum because I needed more books! I started creating differentiated activities to go along with the books. Each adapted book set comes with at least 3 adpated books each book with 3 differentiated corresponding comprehension activities. 1 file folder game to cover vocabulary, 2 differentiated levels of vocabulary task boxes, and 1 counting card activity directly related to the monthly theme. Some packs include bonus materials! 

    • Science Adapted Book Packs
      • I currently have 11 science themed activities listed and 5 science themed adapted book packs available. You can find the link to them above. I also have them available in a BUNDLE.


  • Craft Activities related to topic 
  • Extension Activities from higher level unit 
  • N2Y activities  
 Summer Themes: 

                                  Summer Camp Theme                     Amusement Park Theme


Planning the Lessons 

I don't have a ton of time in my classroom to teach science and social studies content. On top of all the IEP work, speech, occupational therapy, physical therapy, specials, and getting them out to gen ed, I needed to integrate my lessons. So, my planning had to be simplified and integrated. During my small group/morning meeting I decided that when I was reading books, they needed to be adapted and content related. So my first step in my planning is mapping out my literacy activities. You can see those in the picture below color-coded in purple

After I have those planned, I go back and plan on my specific content related activities, which are usually only 15 minutes long. Those are in the picture below color-coded in green

The best part about planning this way, is once I have one month planned, I can pretty much easily plug in the rest of the year's lesson plans! I just re-use the same format and timeline from the first month. Some adjustments might need to be made based on days off, special activities, but for the most part, it's quick and easy to plug in my plans for the month!

Ideas for Lessons

Vocabulary 

I always like to introduce the topics from the unit by introducing the new vocabulary. Some things that I have done in the past to make these activities fun and engaging: 
  • Mystery Box- add items to a box and have the students feel items and take guesses on what the new unit is going to be about. Example: for the light and sound unit I put a light bulb and a tamborine in the box and had students feel and guess what the items were. 
  • Play Hide and Seek- Hide new vocabulary words around the room and have students find them. When they find a vocabulary word have them read it to you. 
  • Mystery Word- Put vocabulary words in a brown paper bag and have students choose a word from the bag and tell class and hang up the word
  • Put students in charge of changing the words- Our words are hanging on the wall next to our white board, I like to lay all the vocab words on the table and ask the student to find ______ and hang it on the wall. 
After I have introduced the vocabulary we play the corresponding match game the next day. 

I like to incorporate the leveled books during my literacy lessons. Typically, I will introduce the first book, and have students find the vocabulary words and highlight them.

For my lower level students, the adapted book packs I use incorporate the vocabulary making it quick and easy for you to assess using the books. I typically read the book and have my students make selections from the icons from a field of 2 or 3 depending on the student. I make sure to emphasize the unit vocabulary words during the story and direct instruction.

We do the vocabulary sort around three weeks into instruction so that I know the students have a had good quality time to absorb the content. I usually use this as an assessment, and students complete either individually or with some physical assistance. For my higher level students they complete independently and have very little accommodations. For my lower level students they complete with some assistance (for physical needs) but I color code their sorts to make it more independent for them.

Color-Coded Vocabulary Sort (Not from Unique, but strategy I use for differentiation) 

Adapted Books/Literacy 

I use both of the leveled books provided in the unit. I adapt them so they are interactive and the students can use icons to engage in the story. If the book warrants, I will use props to keep the kids excited about the story. I use these books to cover content, otherwise I would not have time! My typical routine for literacy is: 
  1. Introduce the book 
  2. Read and emphasize vocabulary 
  3. Have students match icons to story from a field of 2 or 3 
  4. Complete literacy activity and discuss vocabulary 
  5. Re-read book focusing on content 
  6. Comprehension assessment 
I repeat these steps for the five books that I use during the unit. I created my adapted book packs so that I would always have a content related book to read and an activity to correlate! It makes my literacy planning so much easier! 

I love using the literary experience. I use these monthly but pick and choose upon availability of the books that correspond with that lesson. 

Adapted Books for "Plants Can Grow" Unit 

Props for acting out story "Bunny in the Garden"

Science Experiment 

I love doing the science experiments with the kids! I love getting them excited about them! I typically do my science experiment the third week of instruction however in this example (May) I needed to do it sooner due to the nature of the experiment (keeping plants healthy). I break my experiments down into smaller sections to increase engagement. Here is my typical routine for science experiments: 

  1. Day 1- Introduce experiment- show items used in experiment, pass out experiment packet, look through experiment and discuss our steps. 
  2. Day 2- Re-read experiment, discuss and make hypothesis, "check off" materials to make sure we are ready to go! 
  3. Day 3- Conduct Experiment - following steps of experiment 
  4. Day 4- Review our experiment, complete conclusion 
I try to do experiments on Thursdays because we have extra time on this day because we have no specials! 

One fun way I like to get them excited is to purposely leave materials for the experiment out around the classroom. When they find them, I say, "I guess you'll have to wait and see for experiment day!" 

Science Experiment "Keeping Plants Healthy" 


Crafts

I like to do crafts related to the topics of our units. I usually just pinterest or try to think of my own. Also, if you have access to the intermediate level of the unit, they have crafts as part of their lessons! I usually pull from that unit as well. 

Craft for "Our Impact on the Environment" Unit 

Craft for "Plants Can Grow" Unit 

How do you plan your units? I would love to hear new tips and tricks! Drop a comment below if you have any suggestions for me! Follow my classroom journey on instagram for more ideas, tips, and fun!


2